How to obtain an OAuth access token (in Node.js)
In this tutorial, you will obtain an OAuth access token (bearer token) (see definition by oauth.net), which is required to prove that your application is authorized to act as a user. What the application can do is limited by the OAuth scopes (see definition by oauth.net) authorized on an access token.
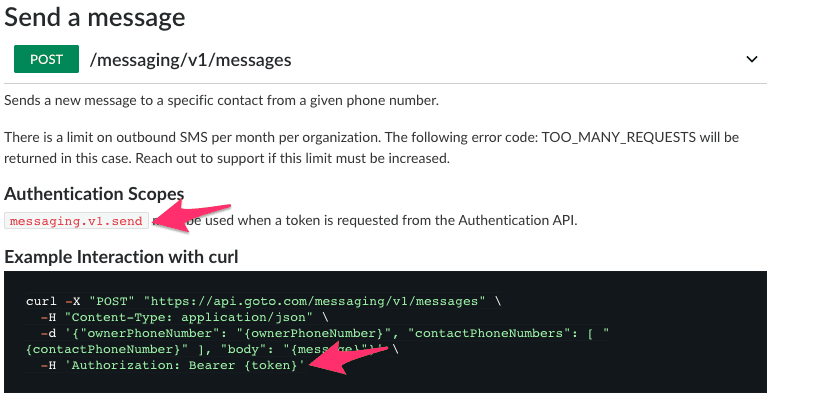
For example, the "Send a message" request
requires a bearer token with the messaging.v1.send scope.
At a high level, you will complete the following steps:
- Install any required software.
- Create a project to house the OAuth assets and demo application.
- Create an OAuth client. This is required to obtain an authorization code, which, in turn, will be exchanged for the access token.
You can follow along or read the completed project.
Prerequisites
- Install Node.js (version equal to or greater than 16.14.2).
Create a project
Set up an initial project to act as the storing place of your OAuth assets and demo application:
- Create a new directory for your project, and give it a meaningful name, for example,
tutorial. - Create a main file inside the new directory called
app.js.
Obtain OAuth 2.0 assets
The following steps will guide you to obtain an access token using GoTo Authentication API's Authorization Code Grant flow. For more information, refer to this short explanation by auth0.com about how the OAuth 2.0 Authorization Code Flow works.
Create OAuth client
To create an OAuth client, follow the instructions in this GoTo tutorial: How to create an OAuth client. At various points of the tutorial (called out one by one below), make sure that you use the values specified here:
-
In section "Create a client (Details)", when specifying a client name, enter:
tutorial-oauth-client -
In section "Create a client (Details)", when specifying a redirect URI, enter:
http://127.0.0.1:5000/login/oauth2/code/goto.Later, this is where your application will listen on to receive authorization codes.
-
In section "Create a client (Scopes)", when specifying a scope, you must first consult the documentation of the API request that you will be using. Here’s why.
The required authorization scopes are specific to each API endpoint and request. Scopes determine the amount of access that the access token will give to an application. To find out the scope(s) relevant to your use case, refer to the API documentation of the endpoint you will be using.
For example, if you wanted to send a message from a GoTo Connect phone number, you would check the documentation of the "Send a message" API request (POST /messaging/v1/messages) and see that the scope to be used is
messaging.v1.send.
Once you have created your OAuth client, you will have a client ID and a client secret.
Note: You MUST keep your OAuth client secret private.
To keep the OAuth client secret private, you can keep it out of your code and store it in an environment variables file along with other OAuth parameters.
-
Create an
.envfile. -
Copy-paste the following code in the
.envfile and replace the client ID and secret with your own values.OAUTH_SERVICE_URL="https://authentication.logmeininc.com" OAUTH_CLIENT_ID="36c12e03-a590-4470-8576-4fefbac7e1f7" OAUTH_CLIENT_SECRET="CNNe6w6MPcI9Im0Qk1scbcXC" OAUTH_REDIRECT_URI="http://127.0.0.1:5000/login/oauth2/code/goto"
Your application will need to read the environment variables from the .env file.
You can do that using Dotenv.
In addition, you will also have to create an OAuth client instance.
For that, you can use Simple-oauth2.
Install both dependencies:
npm install dotenv simple-oauth2To create the OAuth client instance, open the app.js file created earlier and copy-paste the following code.
+require("dotenv").config();
+var { AuthorizationCode } = require("simple-oauth2");
+
+var oauthConfig = {
+    client: {
+        id: process.env.OAUTH_CLIENT_ID,
+        secret: process.env.OAUTH_CLIENT_SECRET
+    },
+    auth: {
+        tokenHost: process.env.OAUTH_SERVICE_URL
+    }
+};
+var oauthClient = new AuthorizationCode(oauthConfig);
Obtain OAuth authorization code
For the next step, you will print an authorization URL containing a state (a random string). The user initiating the request will be authenticating via this URL. You can generate this state using Crypto. It's a built-in Node module, so there's no need to install anything. When the user opens the authorization URL, they'll be redirected to the GoTo authentication service where they will be required to log in before being redirected to your application (the one you're coding right now) with an authorization code and the aforementioned state. If the states are identical, then your application can tell that the request was initiated by the expected user.
Note: The state parameter is optional but recommended. For more information on how to apply it in real-world applications with multiple users, see recommendation by auth0.com.
- In
app.js, apply the following changes:
 require("dotenv").config();
 var { AuthorizationCode } = require("simple-oauth2");
+var crypto = require("crypto");

 // ...

 var oauthClient = new AuthorizationCode(oauthConfig);

+var expectedStateForAuthorizationCode = crypto.randomBytes(15).toString('hex');
+var authorizationUrl = oauthClient.authorizeURL({
+    redirect_uri: process.env.OAUTH_REDIRECT_URI,
+    scope: 'messaging.v1.send',
+    state: expectedStateForAuthorizationCode
+});
+console.log('Open in browser to send a SMS: ', authorizationUrl);-
Run the application:
node app.js -
The following message is displayed. Open the link in a browser.
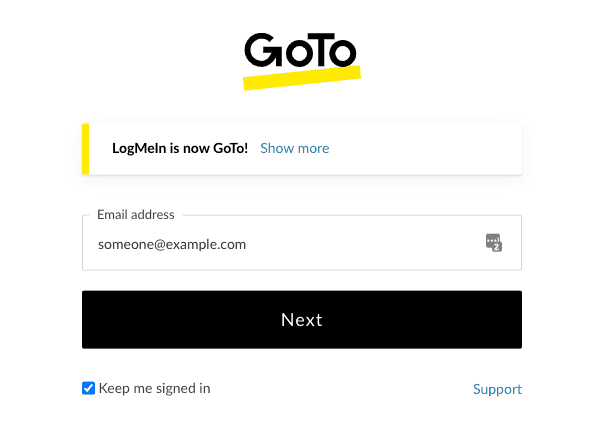
- Log in when prompted:
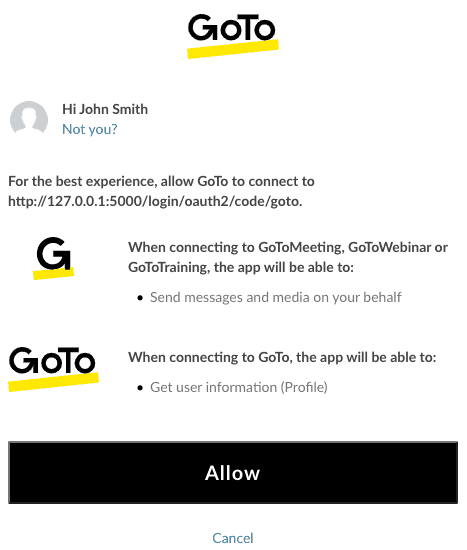
- Click Allow when prompted to give permission to send a message:
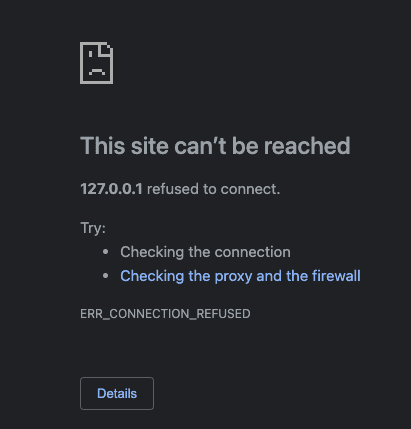
Once you have clicked Allow, the authentication service will redirect you back to your service (the service that you are coding right now) with an authorization code. For now, your server is not listening, so it will show an error.
The next step is to listen for authorization codes and validate the OAuth state. You can do so by making a small server using Express.js.
-
Install
Express.js:npm install express -
In
app.js, apply the following changes:require("dotenv").config(); var { AuthorizationCode } = require("simple-oauth2"); var crypto = require("crypto"); +var express = require("express"); // ... console.log('Open in browser to send a SMS: ', authorizationUrl); +var app = express(); + +app.get('/login/oauth2/code/goto', async function (req, res) { + if (req.query.state != expectedStateForAuthorizationCode) { + console.log('Ignoring authorization code with unexpected state'); + res.sendStatus(403); + return; + } + res.sendStatus(200); + var authorizationCode = req.query.code; +}); + +app.listen(5000);
Obtain OAuth access token
As the final step of the process, your application needs to exchange the authorization code for an access token.
In app.js, apply the following changes:
 app.get('/login/oauth2/code/goto', async function (req, res) {
     res.sendStatus(200);
     var authorizationCode = req.query.code;
+    var tokenParams = {
+        code: authorizationCode,
+        redirect_uri: process.env.OAUTH_REDIRECT_URI,
+        scope: 'messaging.v1.send'
+    };
+    var tokenResponse = null;
+    try {
+        tokenResponse = await oauthClient.getToken(tokenParams);
+    } catch (error) {
+        console.log('Access Token Error', error.message);
+        return;
+    }
+    var accessToken = tokenResponse.token.access_token;
 });

 app.listen(5000);
Run the application again:
node app.jsCopy the link in your terminal and open it in a browser, you should see "OK" on that page. You now have an access token variable that will allow your application to act as the user. You will need to include it as a bearer token in your requests.
- How do I get started?
- How to create a developer account
- How to create an OAuth client
- How to obtain an OAuth access token
- How to obtain an OAuth access token using a Personal Access Token
- How to obtain an OAuth access token (in Node.js)
- How to Obtain and Use Refresh Tokens
- Migrating to New Token Retrieval with authentication.logmeininc.com
- How to use GoToConnect API to fetch account users and lines
- How to create, update and delete account users via Admin API
- Call Events Screen Pop Tutorial
- Send SMS tutorial
- How to use Voice Admin APIs
- How to create a channel and receiving notifications from GoTo services
- How to subscribe to and get call events
- Fetching Call Events Reports
- Make and Receive Calls using the Devices and Calls API
- GoTo Connect APIs Host Migration
- GoToWebinar webhooks
- How to use GoToWebinar webhooks
- What API information is available for GoToMyPC?
- How to Setup an Integration with Central
- How to Setup an Integration with Rescue
- Rescue iOS and Andriod SDK
- Introduction
- Java SDK
- .NET SDK
- Direct login migration
- How to use Postman API collections
- How much do the GoTo APIs cost?
- How do I get support for the APIs?
- Rate Limiting


